Risk Assessment Configuration
Critical Step: Defining a robust risk assessment model is the foundation of effective incident management. It ensures that every reported incident is automatically assigned a severity score (SAC or Matrix), helping your team prioritize critical issues immediately.
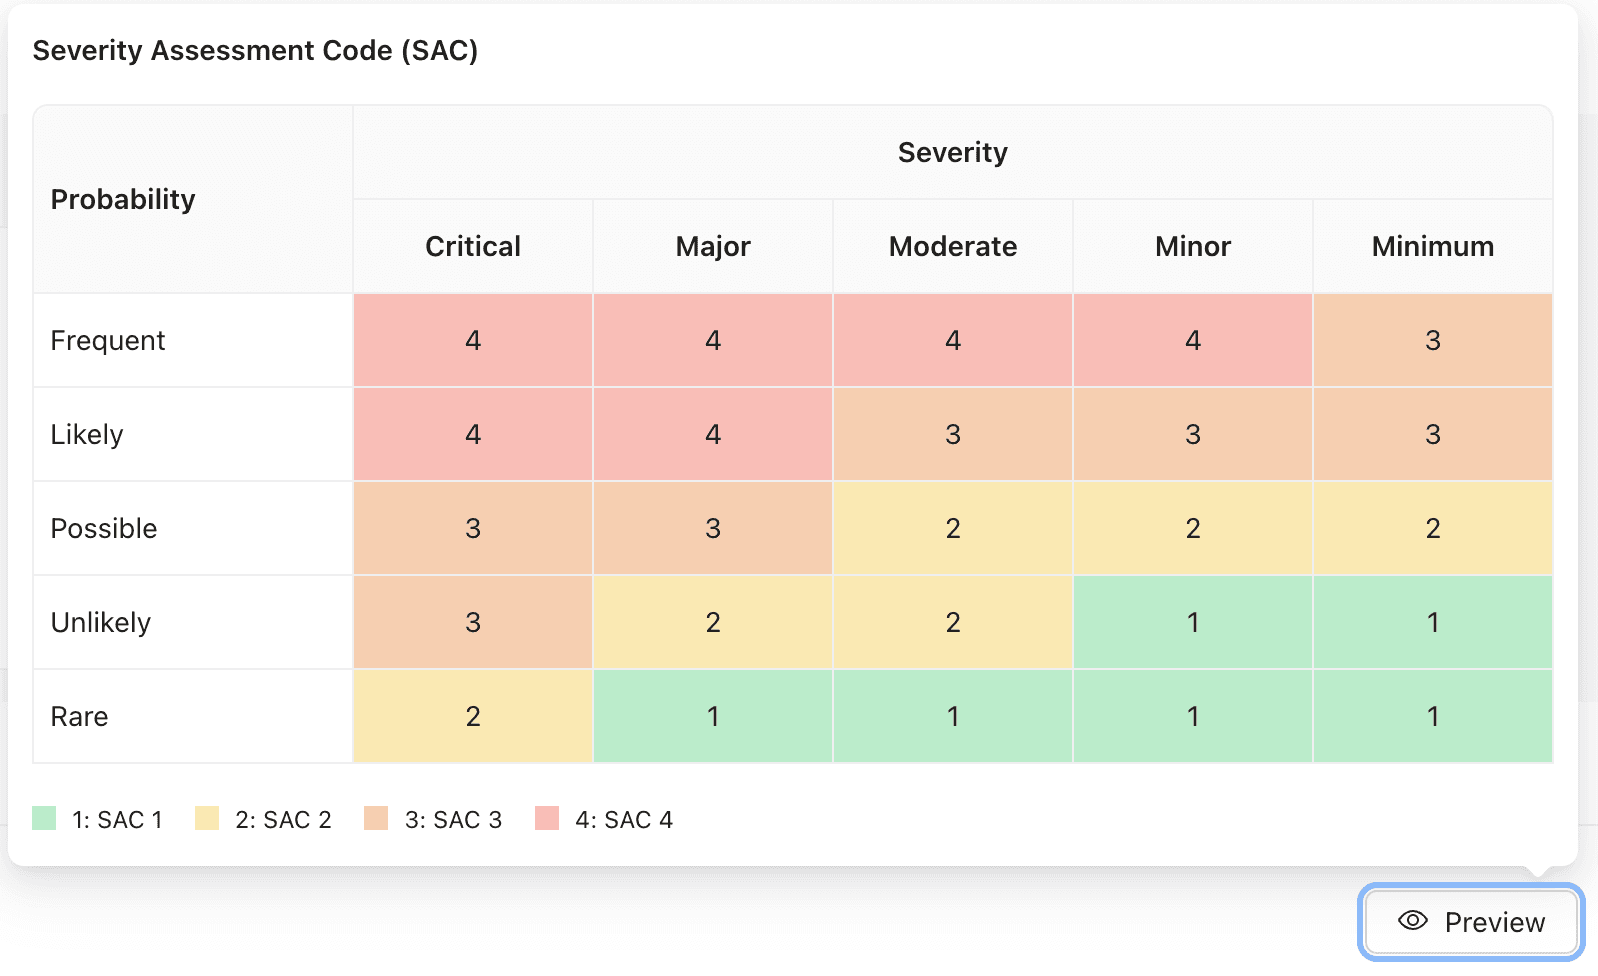
Severity Assessment Code (SAC)
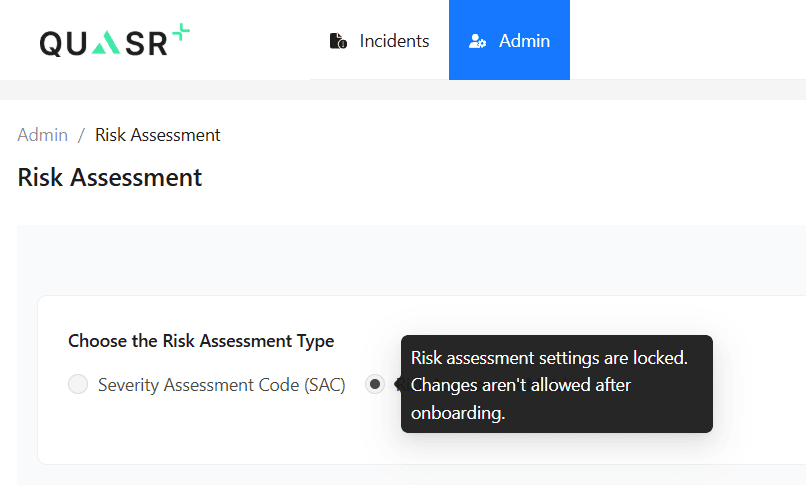
Locked Settings: The primary Risk Assessment Type (SAC vs Matrix) is selected during onboarding and cannot be changed once the account is active. This ensures data consistency across all historical reports.

Overview
The Risk Assessment module allows you to define the grid used to calculate incident severity. This involves three key components:
- Parameters: The axes of your matrix (e.g., Severity and Probability).
- Scoring Logic: The logic that combines these parameters to produce a score (SAC 1-4).
- Incident Category Groups: Distinct configurations for different category groups (e.g., Clinical, Non-clinical).
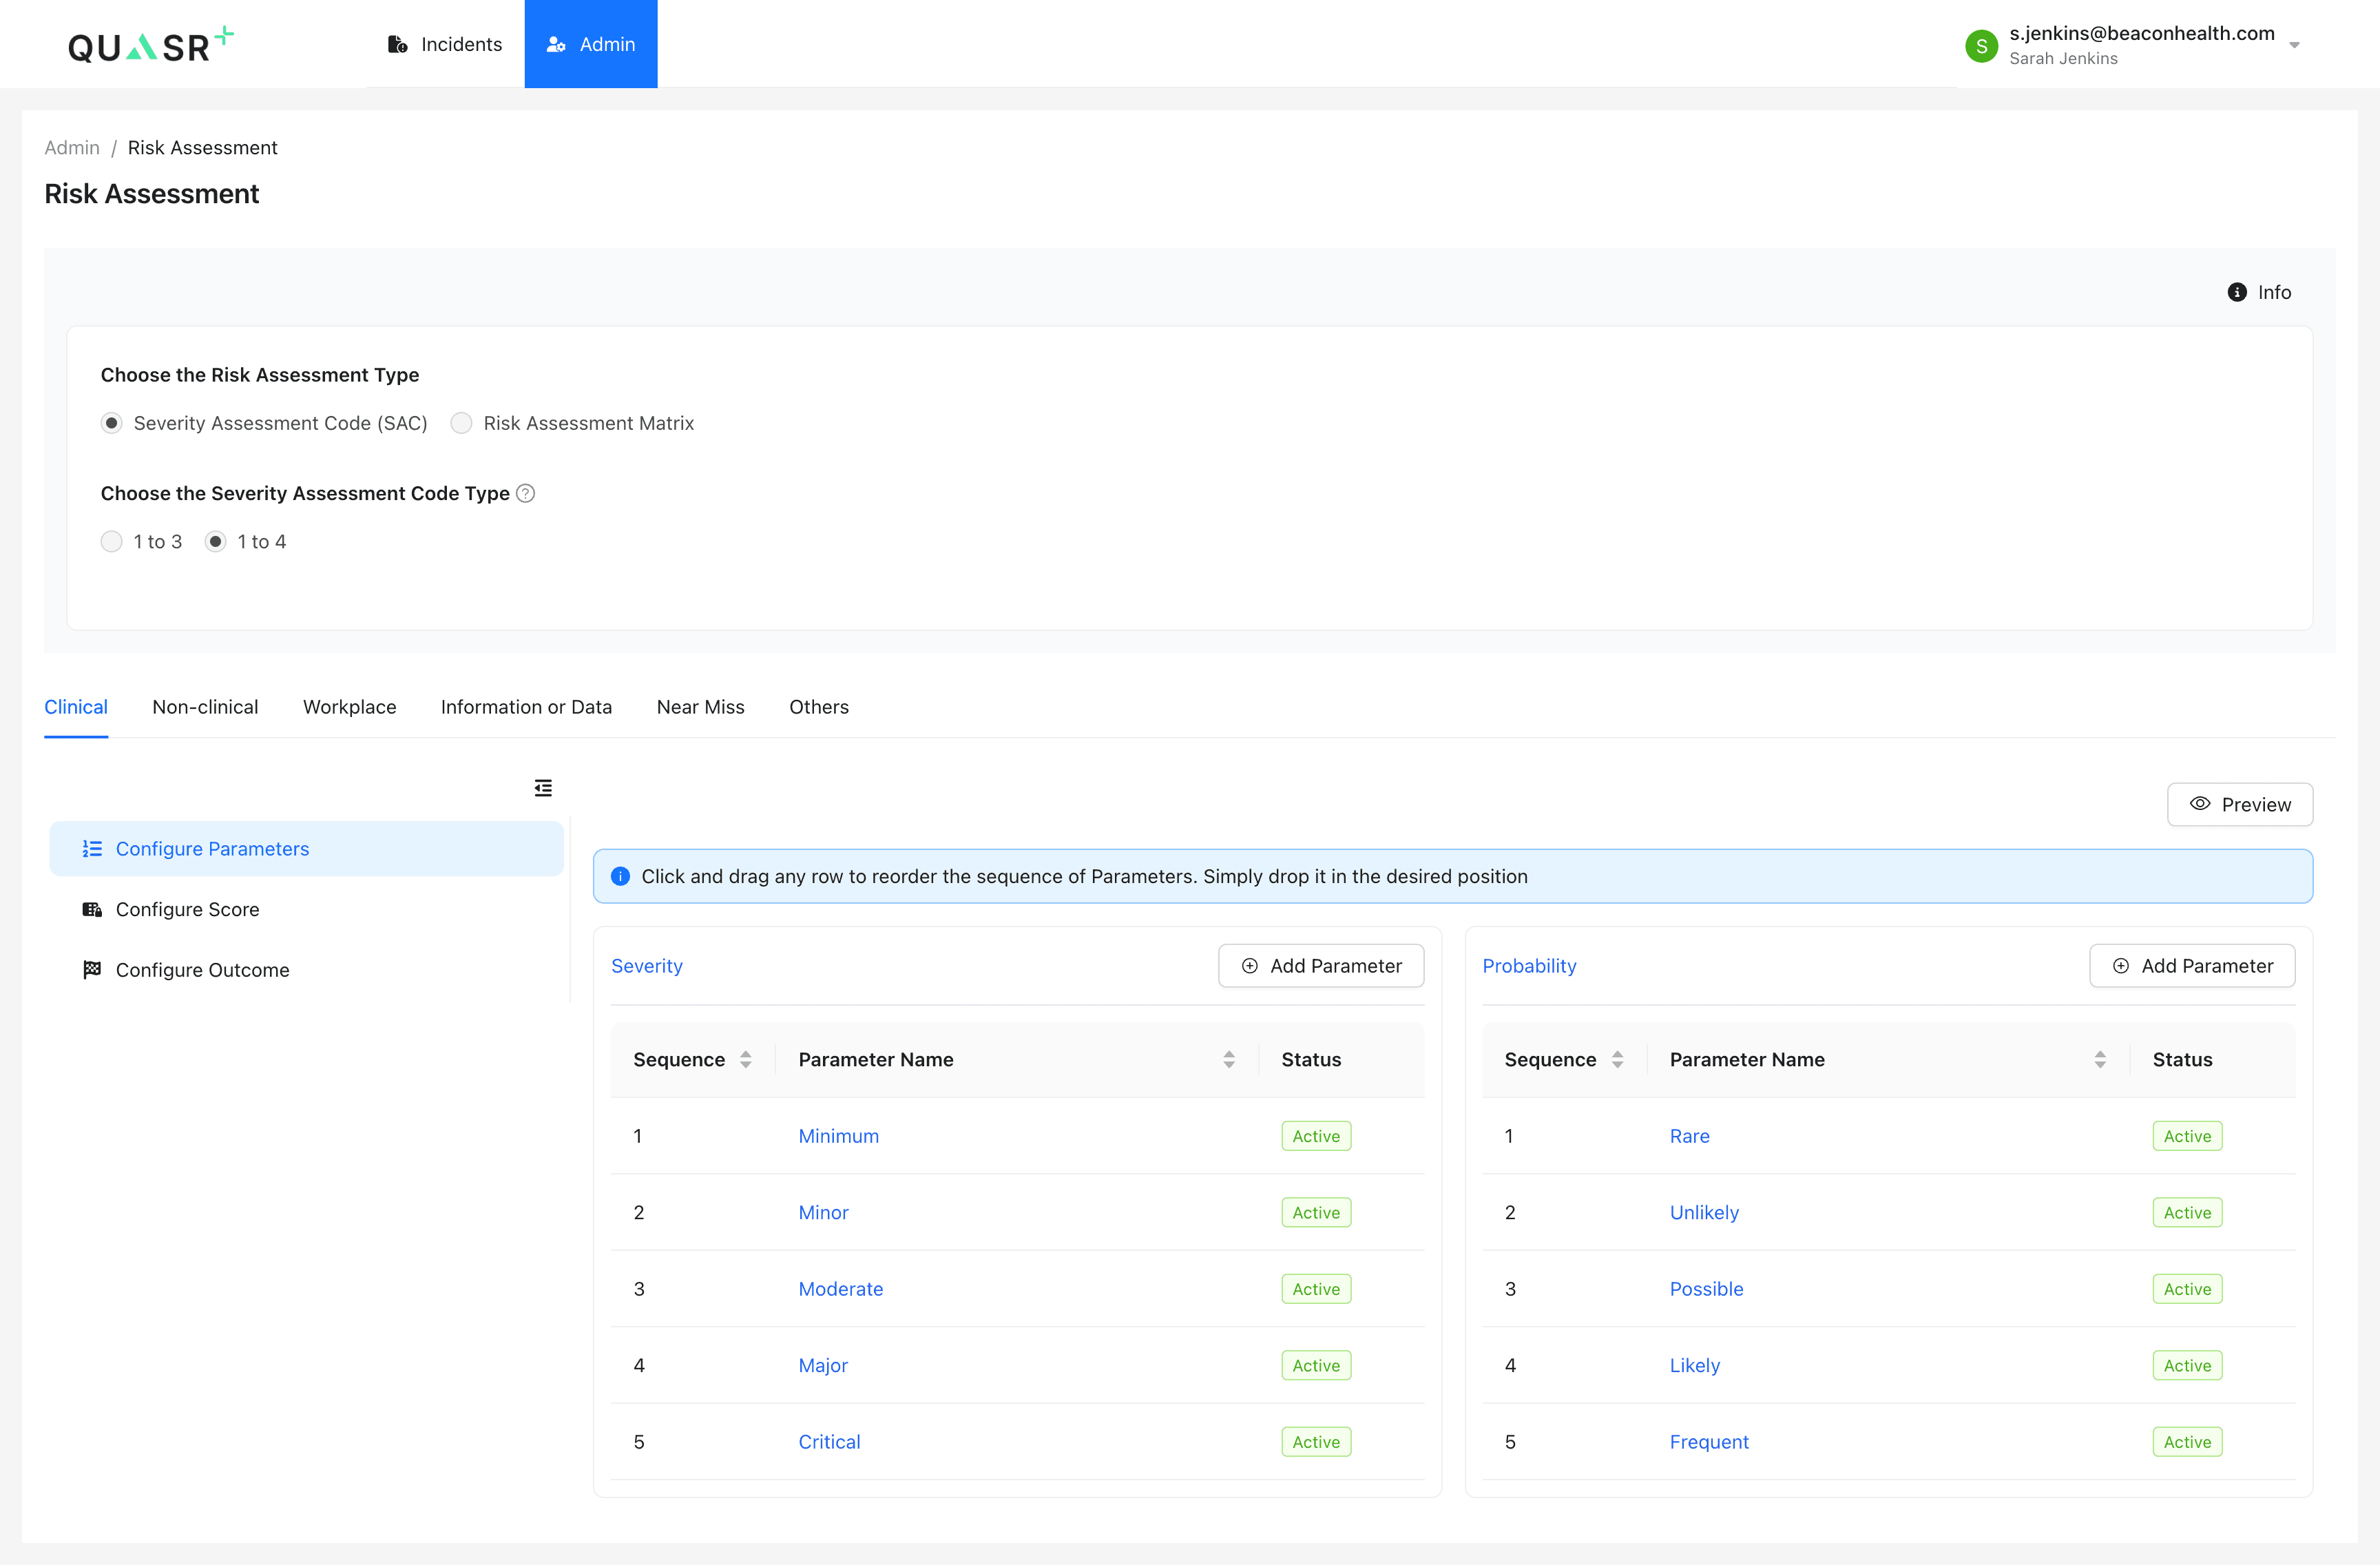
Configure Parameters
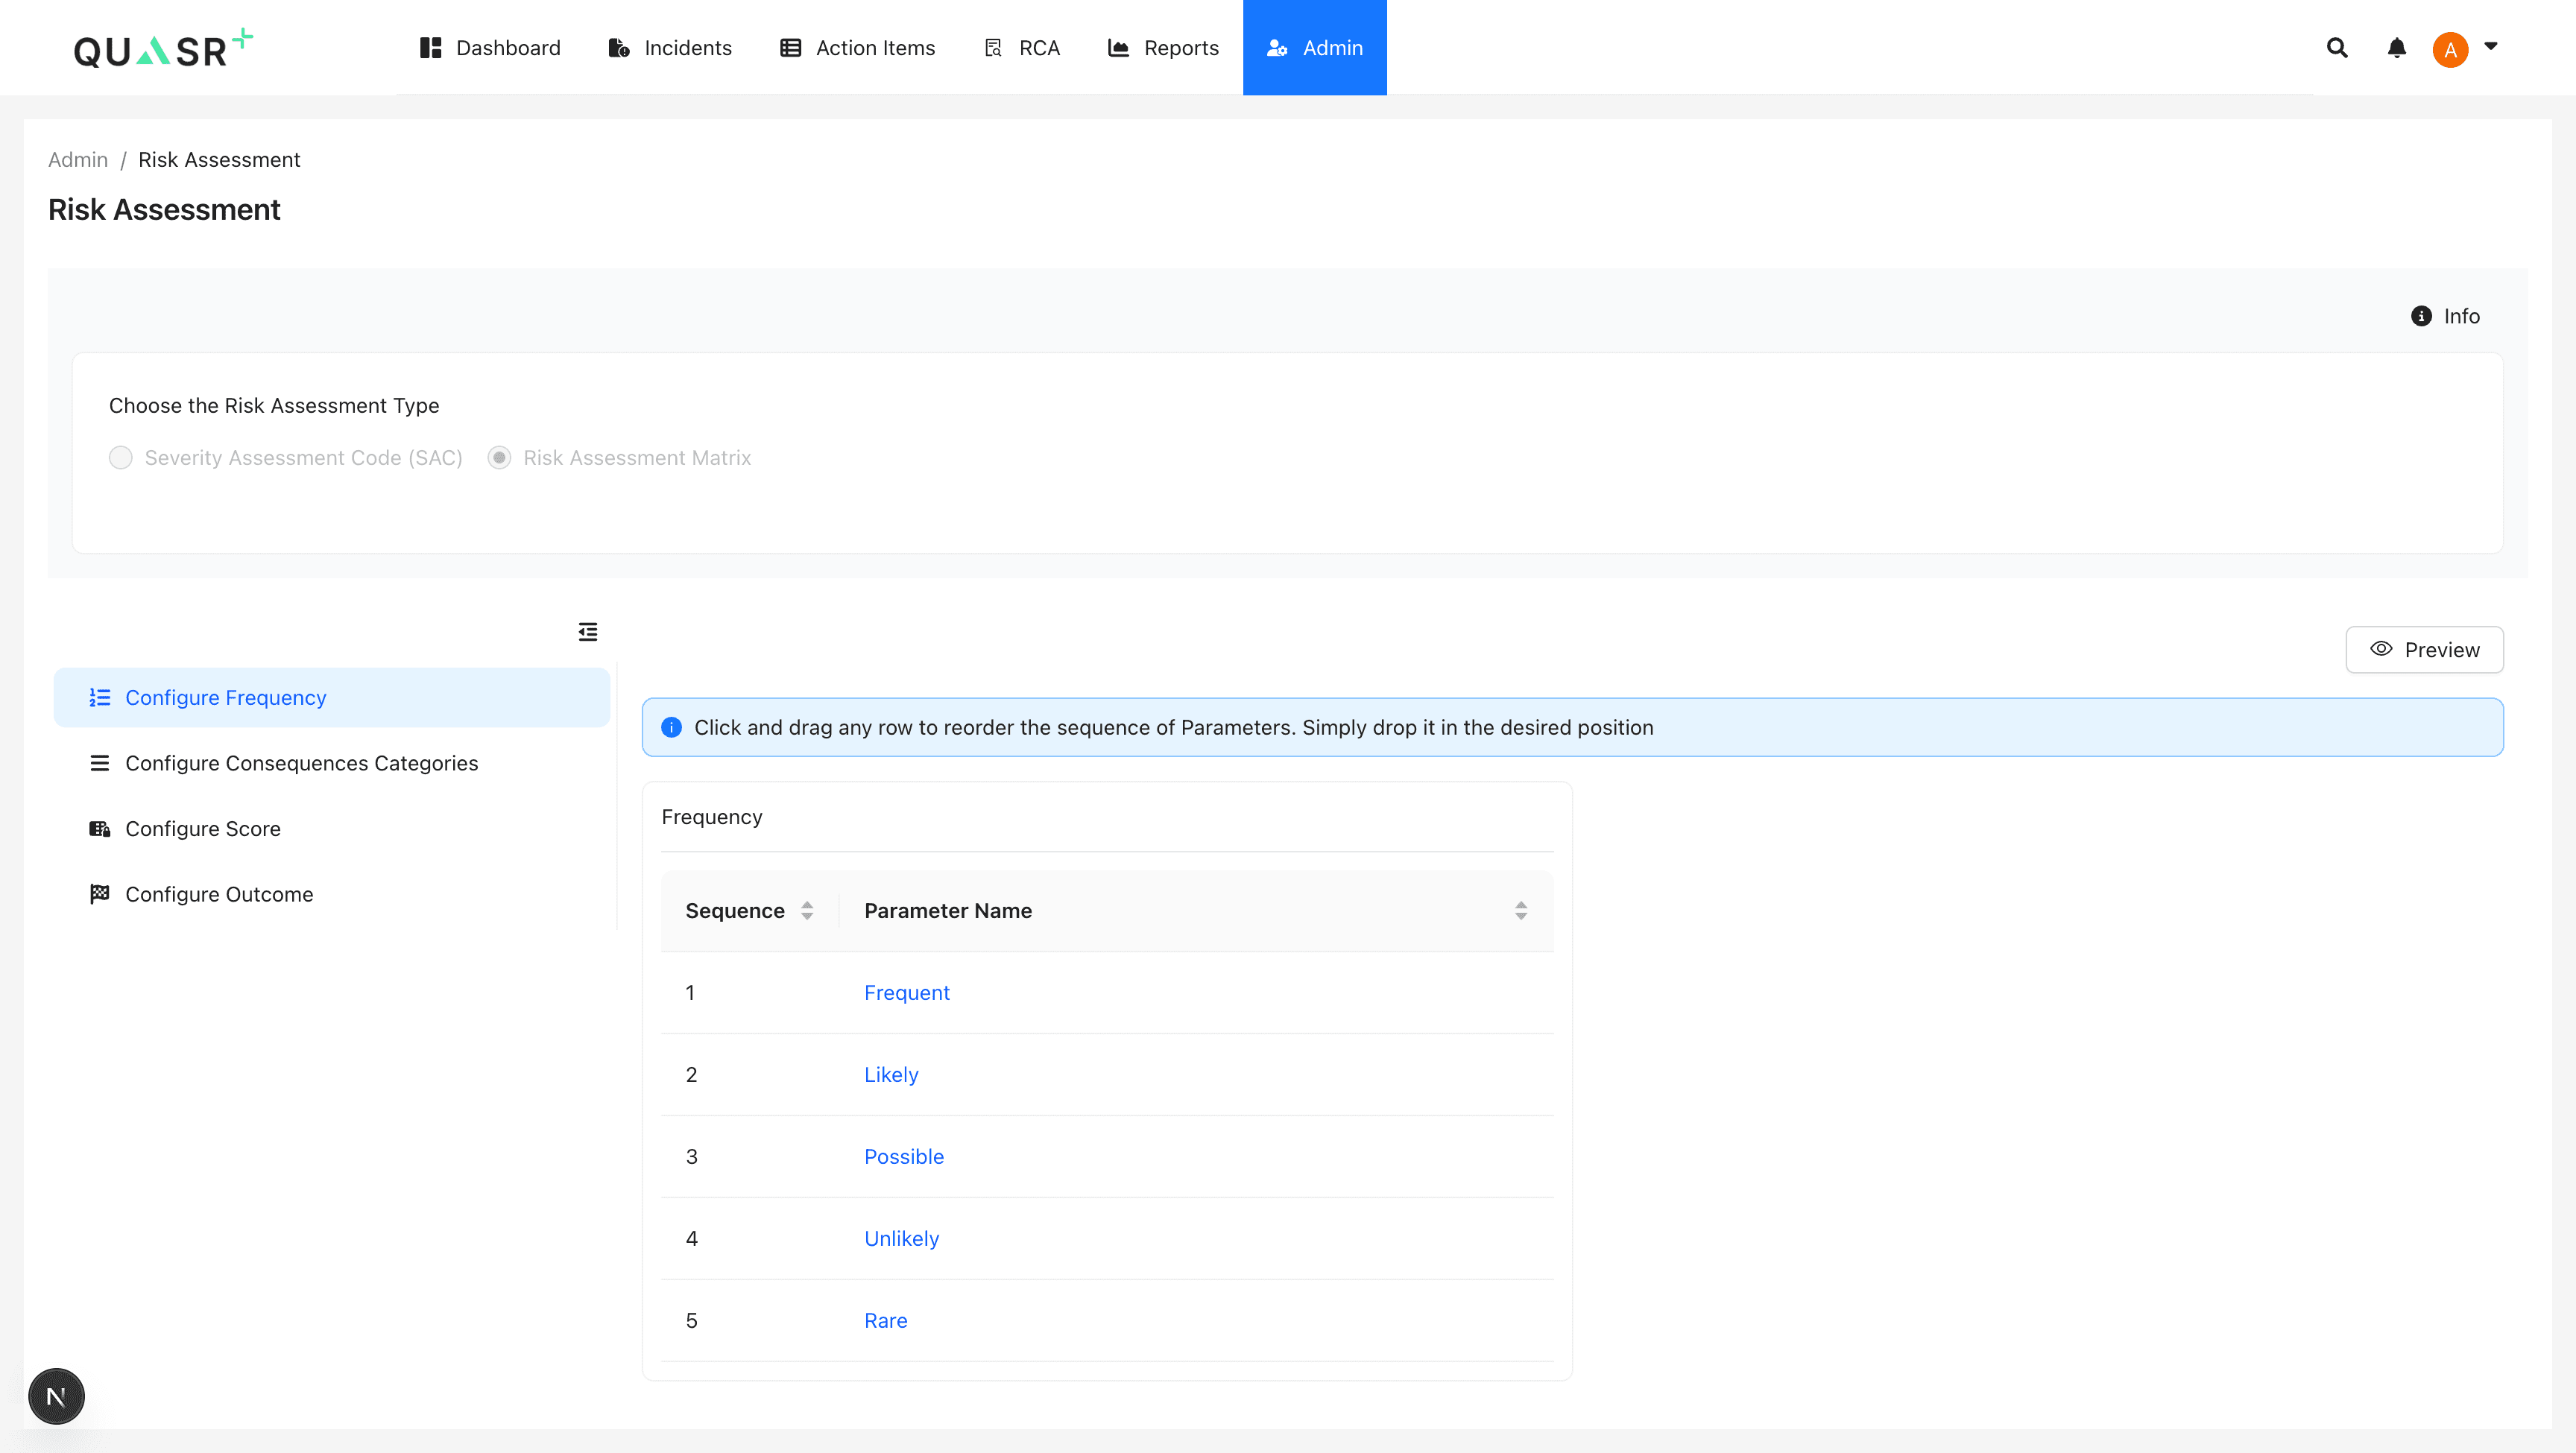
You can customize the levels for both Severity and Probability to match your organization’s terminology.
- Severity: Defines the impact of the incident (e.g., from Minimum to Critical).
- Probability: Defines the likelihood of recurrence (e.g., from Rare to Frequent).
Managing Parameters
- Add: Click + Add Parameter to introduce a new level.
- Reorder: Drag and drop rows to change the sequence (e.g., moving “Critical” to the top).
- Status: Toggle parameters to
ActiveorInactive.
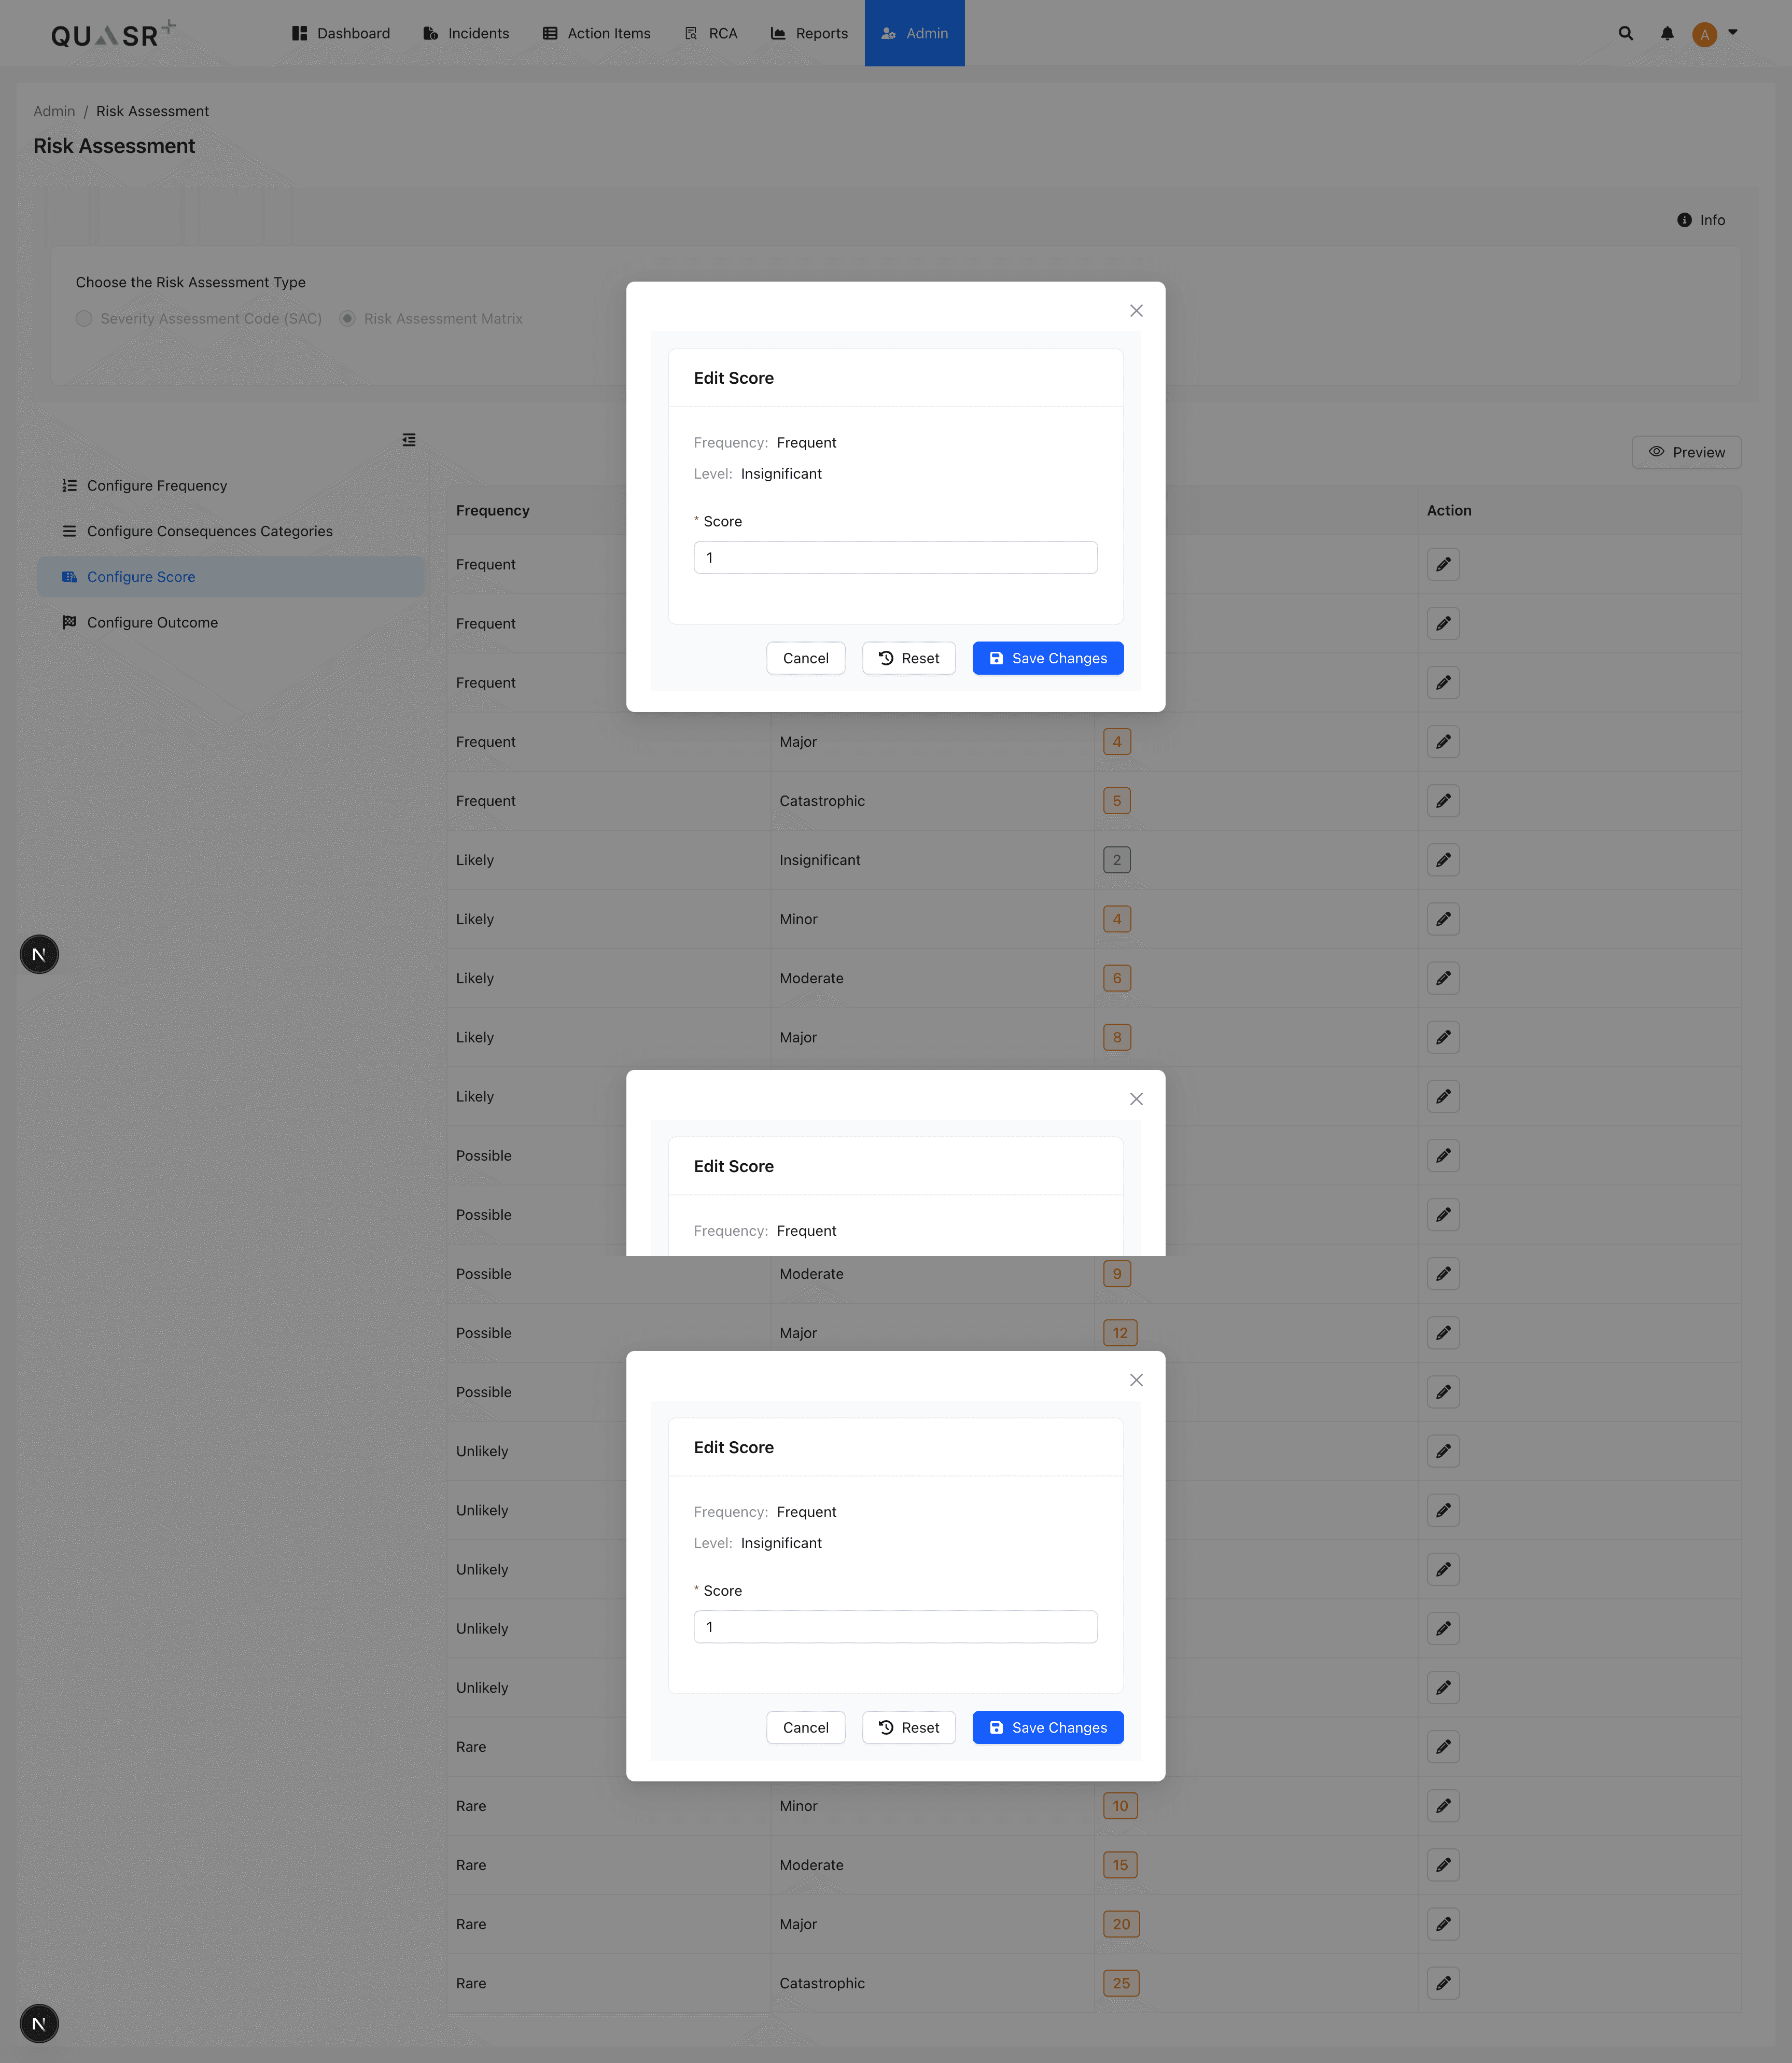
Configure Scores
After defining parameters, you must assign specific scores to each Severity + Probability combination.
Category Groups: You can define different scoring rules for different contexts by switching tabs (e.g., Clinical vs Non-clinical). This allows you to have a stricter risk model for patient safety incidents compared to workplace hazards.

How to Assign Scores
- Navigate to the Configure Score tab.
- Review the list of all possible combinations (e.g., Minimum Severity + Rare Probability).
- Click the Edit (Pencil) icon to assign a score (e.g., 1, 2, 3, or 4).
- Repeat this for all Category Groups (Clinical, Non-clinical, etc.).
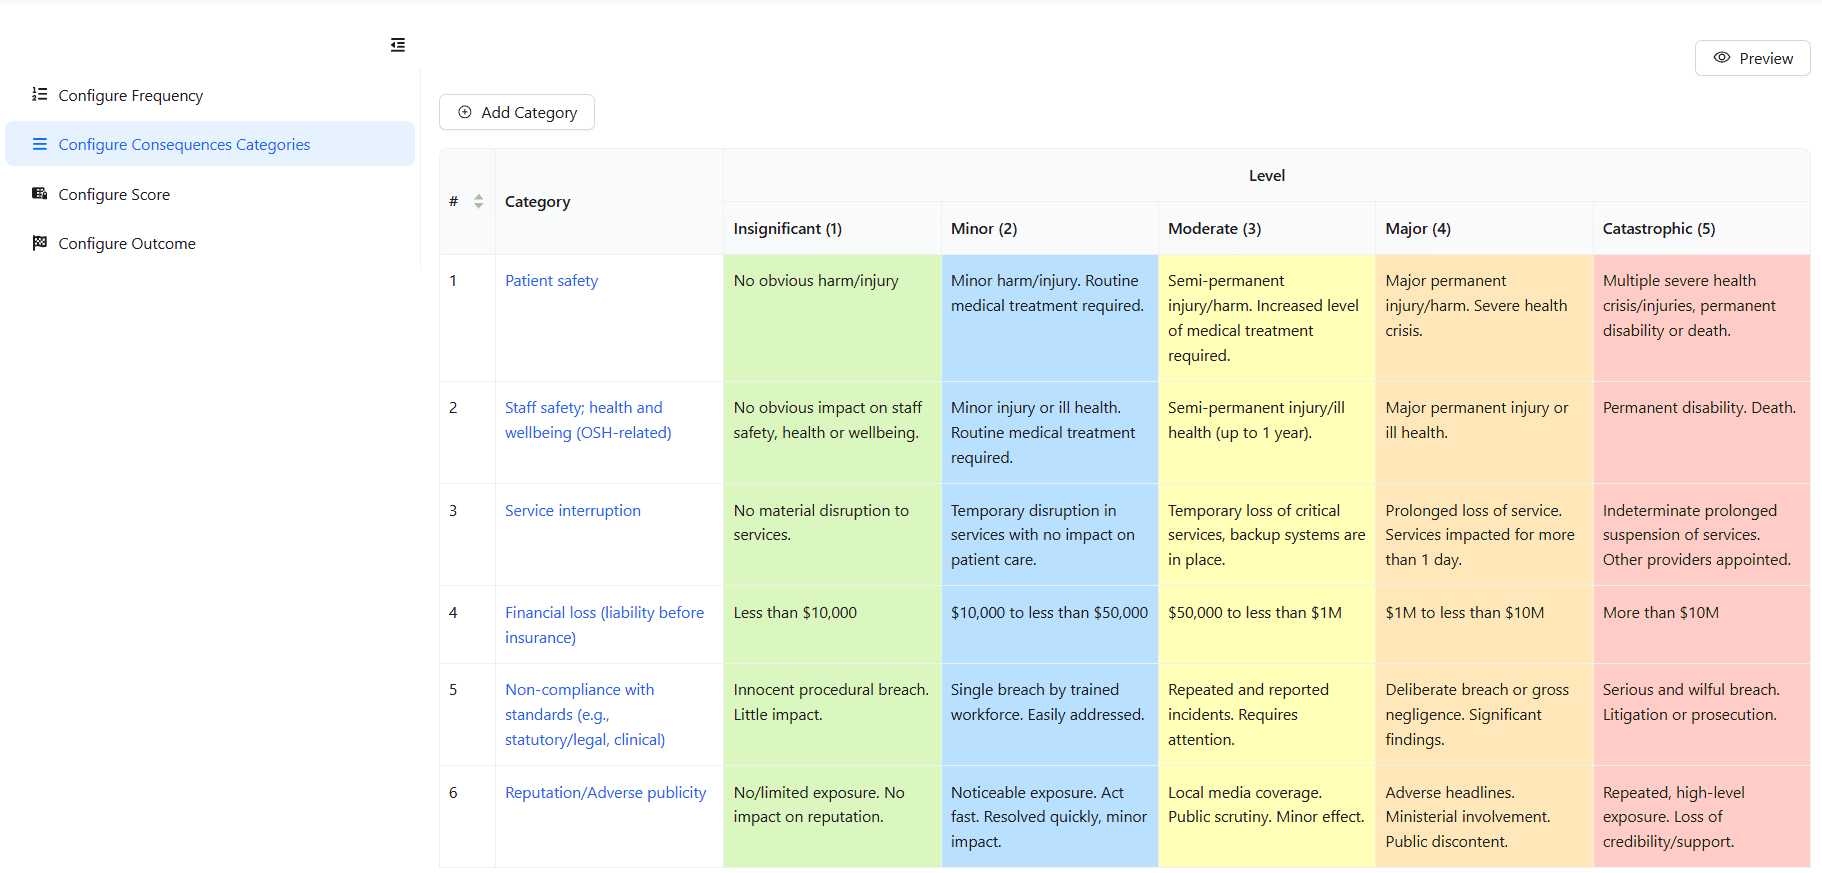
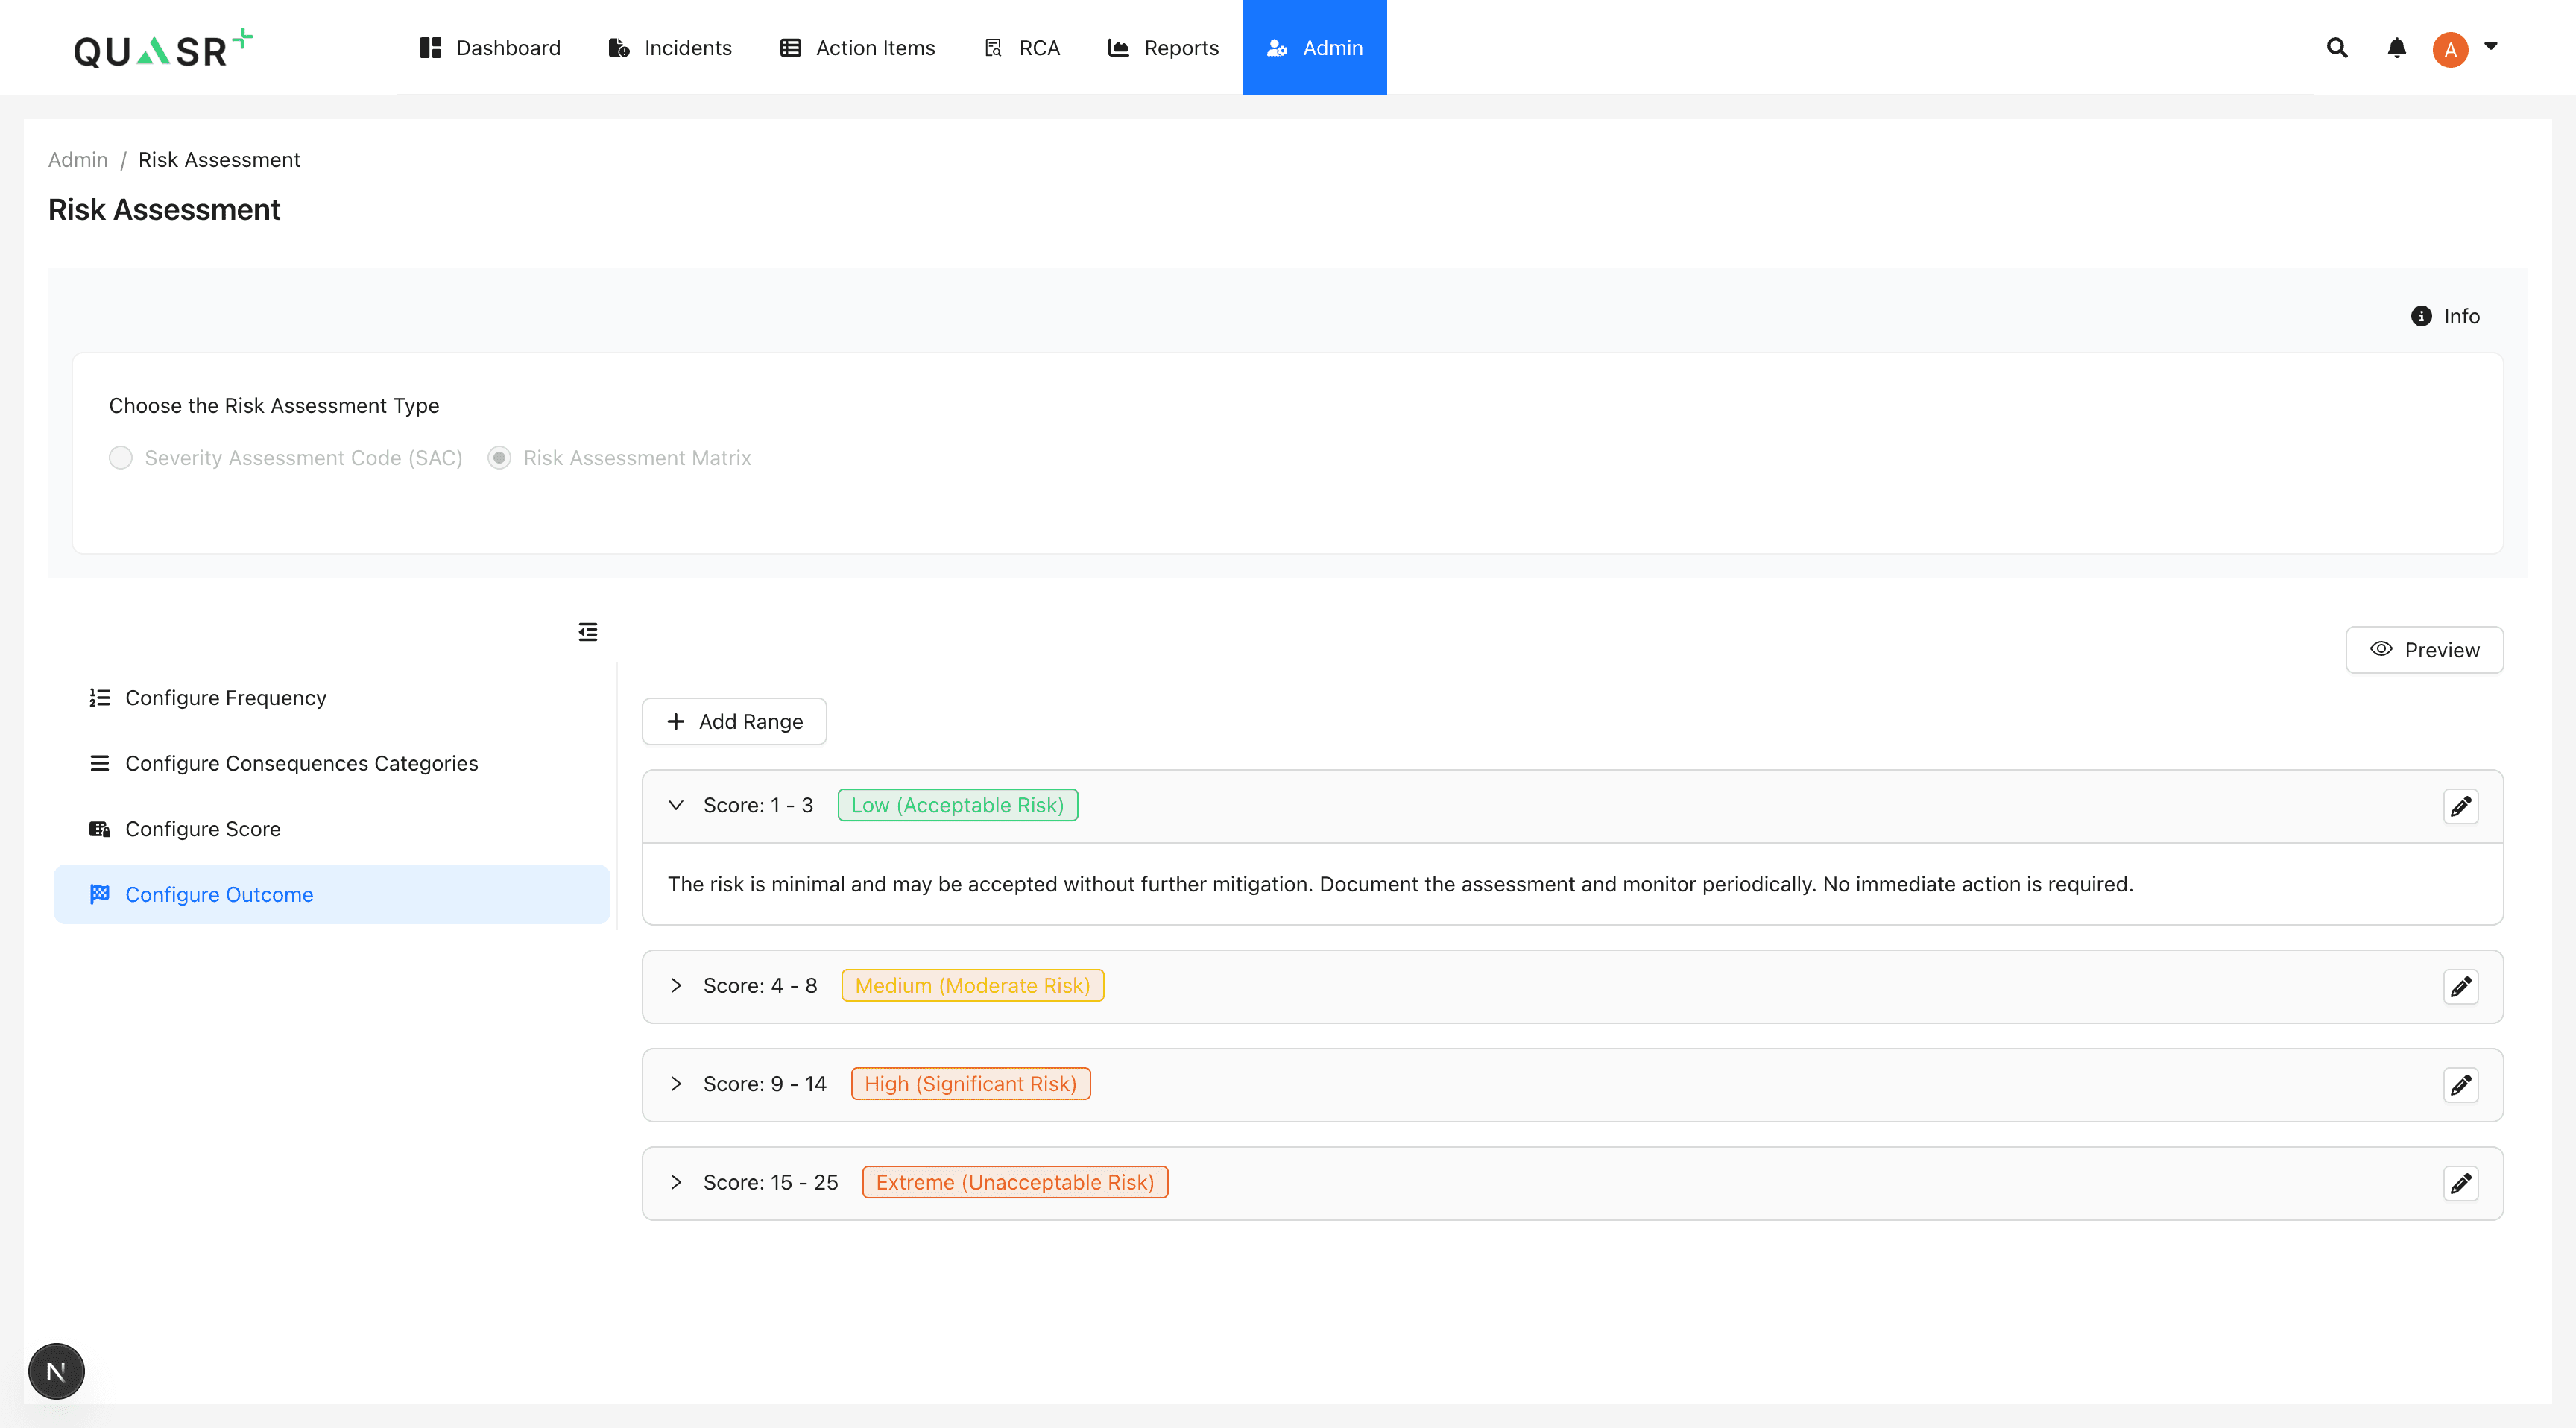
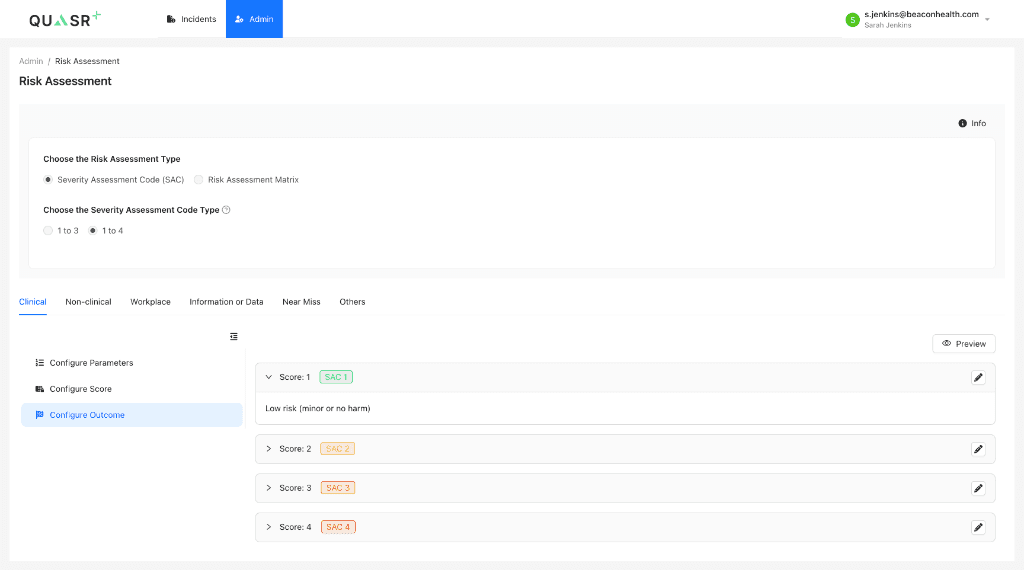
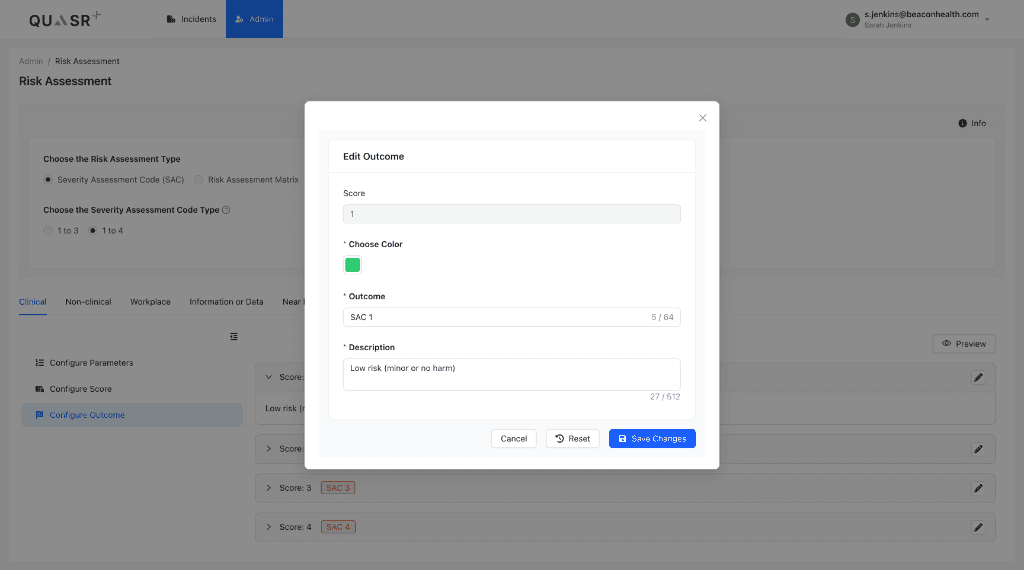
Configure Outcomes
The final step is to define what each score means for your organization. This includes the label, color code, and description.
Defining Outcomes
- Go to the Configure Outcome tab.
- Click the Edit (Pencil) icon to define outcomes.
- Outcome Label: specific the display name (e.g., “Critical Risk” or “SAC 1”).
- Color: Assign a visual indicator (Red, Orange, Yellow, Green).
- Description: Detailed explanation of the risk level (e.g., “Immediate investigation required”).
Preview Configuration
Once customized, click the Preview button at the top-right to see the fully rendered Risk Matrix. This view confirms how Facility QMs will see the risk grid when reviewing incidents.